Building an Ivy Bridge Hackintosh Desktop
For the past few years I have been using an original Intel Mac Mini from 2009 as a home desktop. For simple A/V serving the system works fine, but it slows down when handling multiple users and is very slow when manipulating photos in Adobe Lightroom.
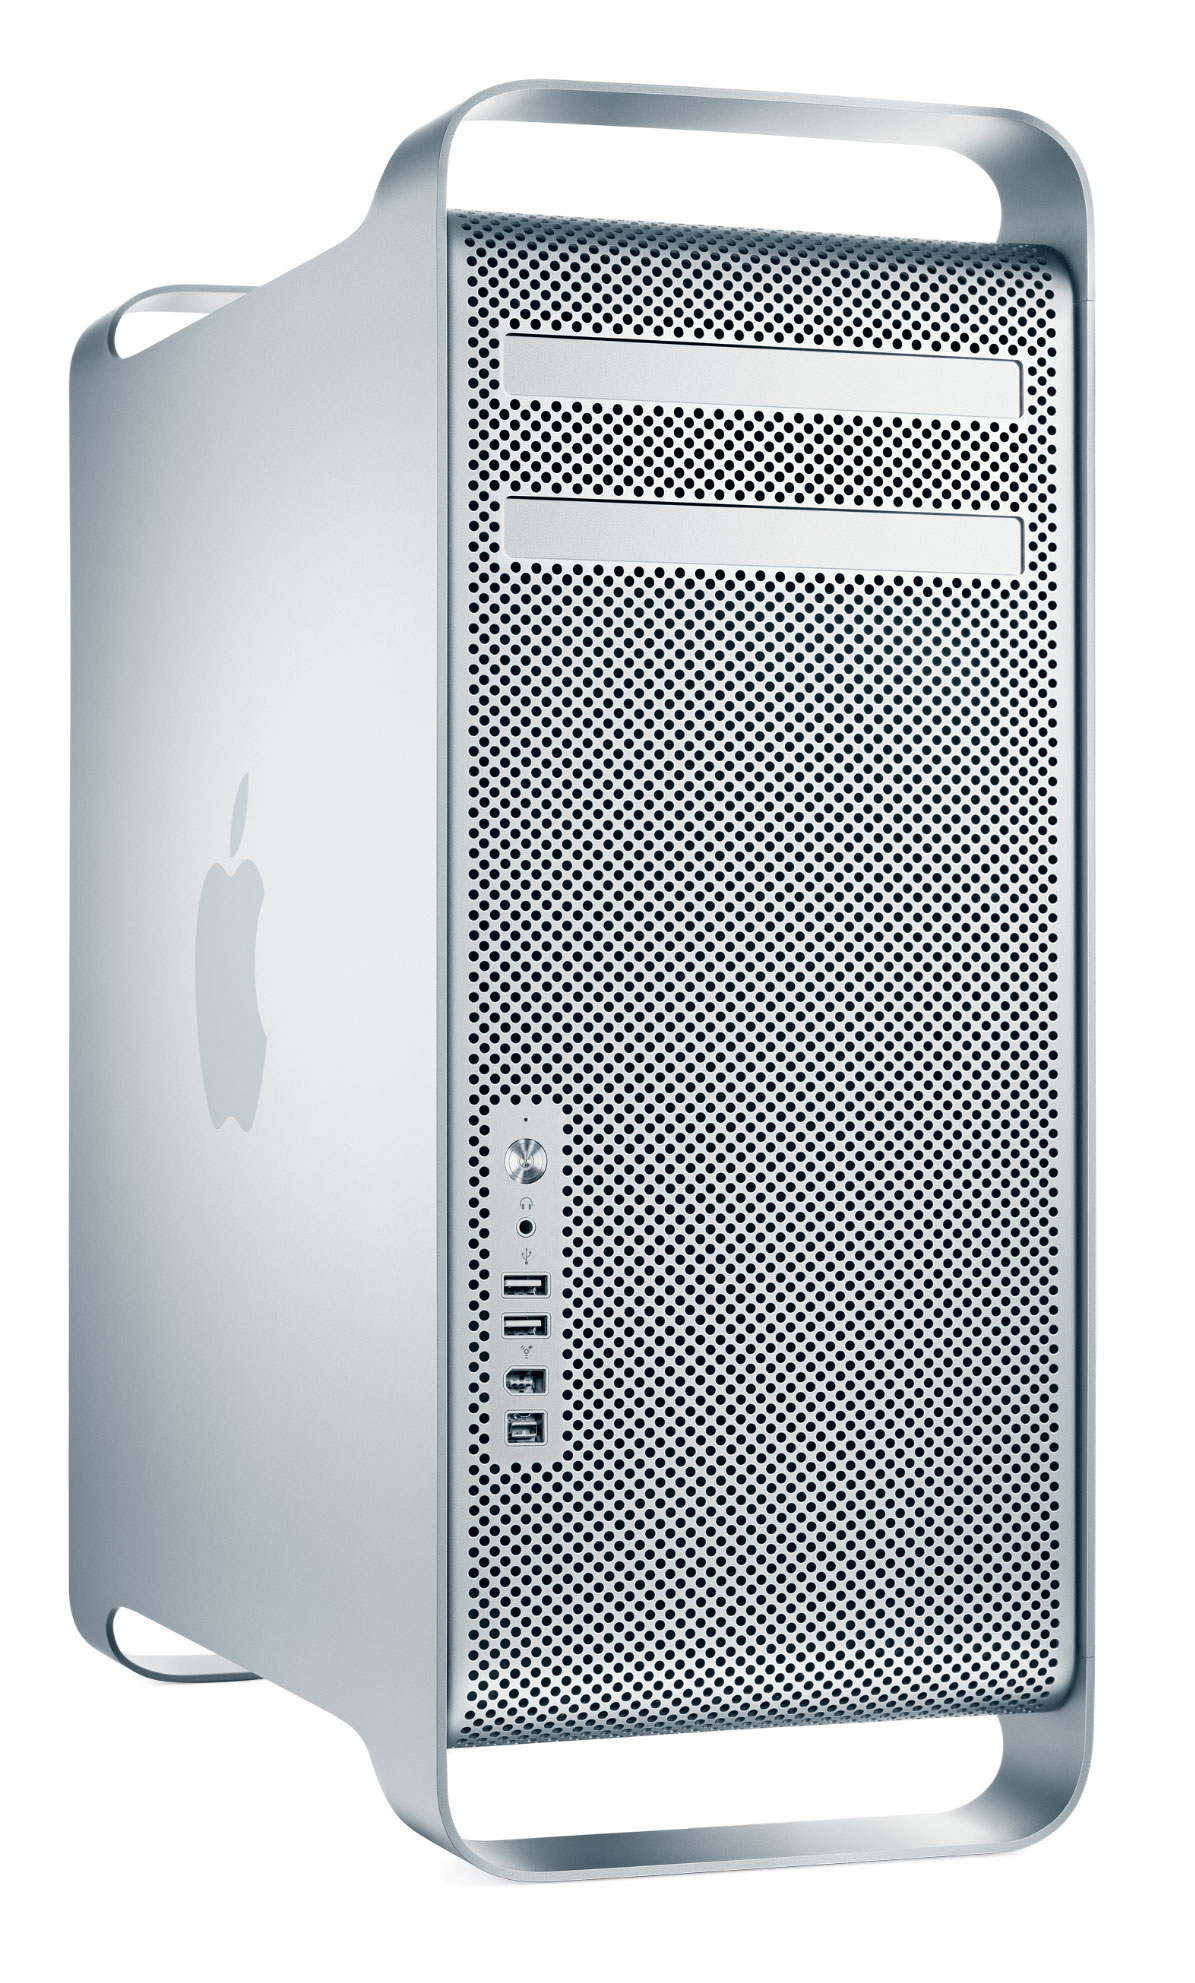
Since laptops outsell desktops by a wide margin, Apple produces a much more complete range of laptop options than desktop options. On the desktop side you are left choosing between the low end Mac Mini and the very high end Mac Pro. There is also the option of the all-in-one iMac, although I prefer to have a separate monitor and computer.
Although I’m not crazy about it, the iMac is the best mid-range desktop Apple makes. Unfortunately it comes with a very high premium… Here is an iMac configured as I wanted:

|
And here is a slightly more powerful Hackintosh, excluding a $400 27” 2560x1440 WQHD monitor:
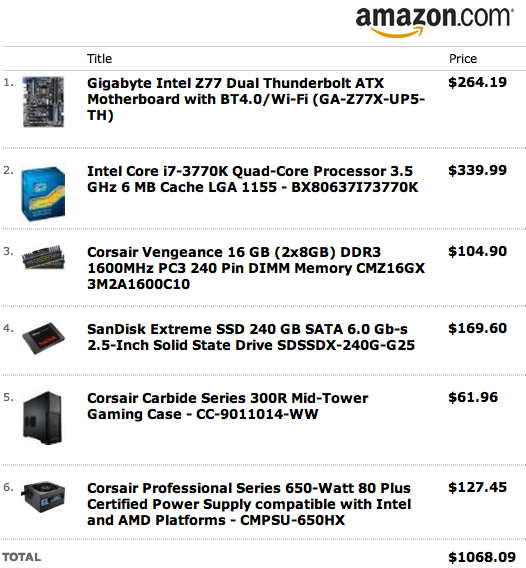
|
I’m certainly not opposed to purchasing Apple’s hardware, even with a premium. Between my wife and I we have two Apple laptops, two iPads, and two iPhones. Unfortunately, Apple just doesn’t have a great mid-range desktop in their lineup to match my needs. Given the fun of tinkering with technology and $1500 in savings (actually $1900 since I’m reusing my monitors), the decision to build a Hackintosh is an easy one this time around.
I’ve gone the Hackintosh path in the past when I built an MSI Wind mini-notebook, so I do have some prior experience. Before we get started, I’d like to mention a few warnings and caveats (loosely borrowed from a great Hackintosh review by David Ramsey):
-
This is a description of my personal experience building a Hackintosh. If you want to build one yourself, I’d recommend going to tonymacx86.com to review their detailed build and installation guides.
-
You must be comfortable with building your own computer and tinkering with hardware before you go down this path.
-
At the end of the day, you might end up with something more power and/or less expensive that an Apple system, but you do not have an Apple system. It will take you a more time when you want to do hardware or OS upgrades because of the path you chose.
Build and Installation Guides
To build the new system, I relied heavily on the CustoMac guide from tonymacx86.com. The users over at tonymacx86.com have done extensive testing of the various component options and have narrowed down the choices to ones that work well with OSX.

InsanelyMac.com is also a good source of Hackintosh information.
System Components
In my experience, it makes sense to spend a little more money up front to get a more powerful system that will meet your future needs (and/or future software bloat) for that much longer. I don’t necessarily need a 3.5 Ghz quad-core, 16 GB of memory, or Thunderbolt ports, but the incremental cost is low enough that it made sense to incorporate them. While the system ends up being a bit overpowered for my needs today, I only spent an extra $100-200 to build a much more future-proof system.
An important consideration for me was native compatibility with OSX. As you will see later on, I only needed to install two drivers to get everything working. Given my choices it would be very easy to reduce that to no drivers if I wanted. Overall, the simplicity of the setup process far outweighs the cost savings from using components one might otherwise have around.
Given that overview, we can dive into my design decisions:
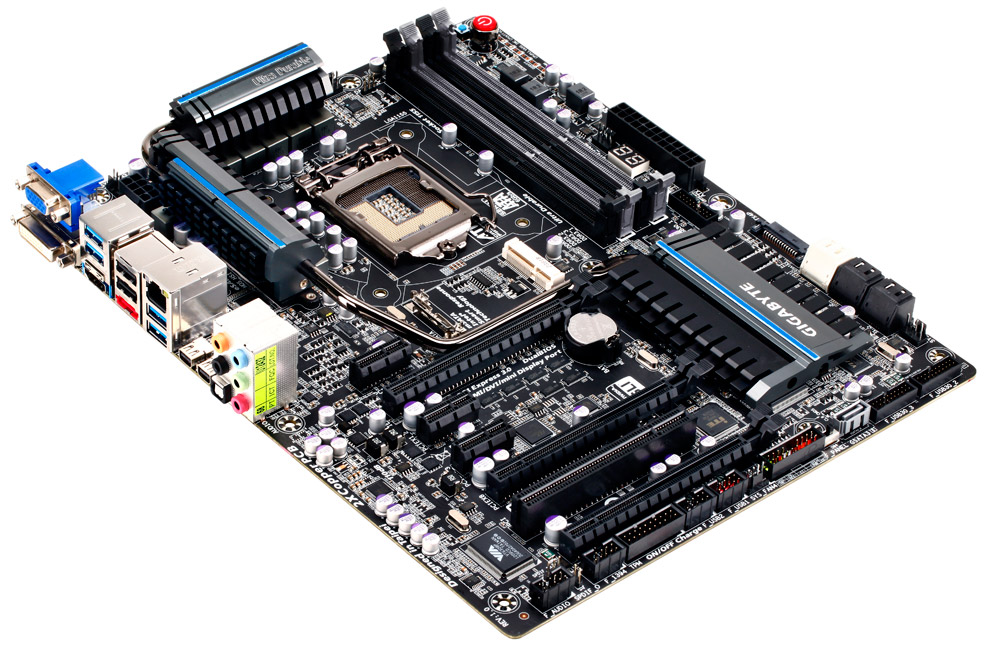
Motherboard
I went with the Gigabyte GA-Z77X-UP5-TH motherboard for the new system. While the Thunderbolt ports are not yet plug-and-play under OSX with this chipset (e.g. the devices need to be plugged in when the machine boots up), I do expect that will be resolved soon enough. Even if it isn’t, I think it is valuable to have Thunderbolt for future compatibility with monitors and storage devices.
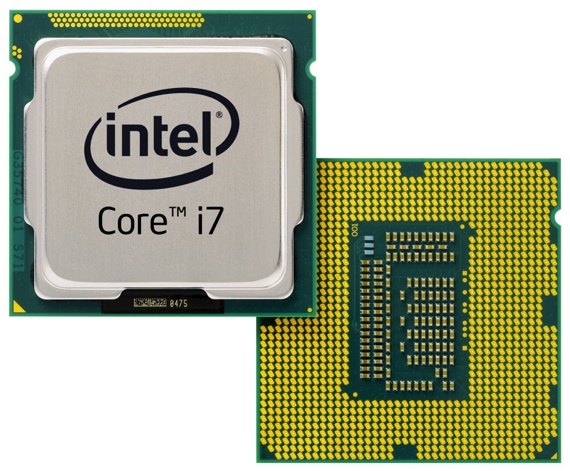
### CPU To go along with the Gigabyte motherboard, I purchased the new [Intel Core i7-3770K](http://ark.intel.com/products/65523/Intel-Core-i7-3770K-Processor-(8M-Cache-up-to-3_90-GHz) processor. The i-3770 is a quad-core 3.5 Ghz hyper-threaded Ivy Bridge CPU with integrated HD 4000 graphics.
The K designation means it is unlocked to allow for overclocking. While I don’t plan on overclocking to begin with, I wanted the option in the future.
The HD 4000 graphics should be fine for now, but I may buy a discrete video card for GPU processing offload in the future.
Memory
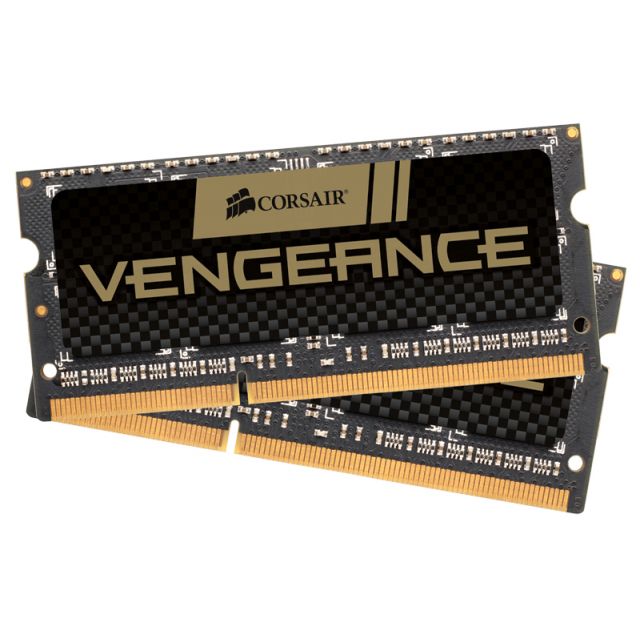
16GB of memory should be more than sufficient for my needs, so I bought the Corsair Vengeance 16 GB. I still have two memory slots free, which will allow me to expand up to the system maximum of 32 GB if I need more memory in the future.
### Storage
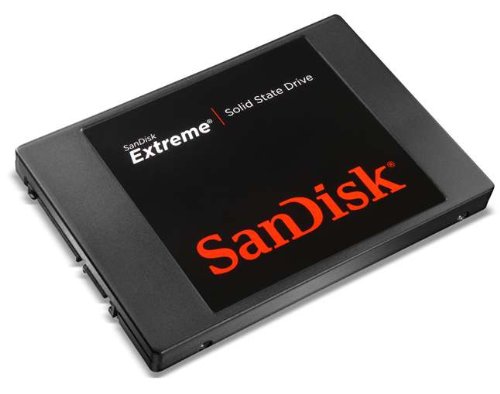
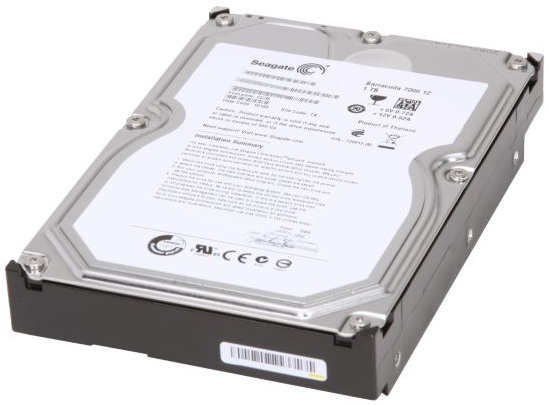
To get a good balance between performance and cost, I went with a smaller SSD system disk and a larger hard drive for bulk data. I bought a SanDisk Extreme 240 GB SSD for the system disk and used a spare Seagate Barracuda 3.5” 1 TB drive that I already had for the data disk. I will probably add another 1 TB drive to allow me to mirror the data disk for some additional redundancy.
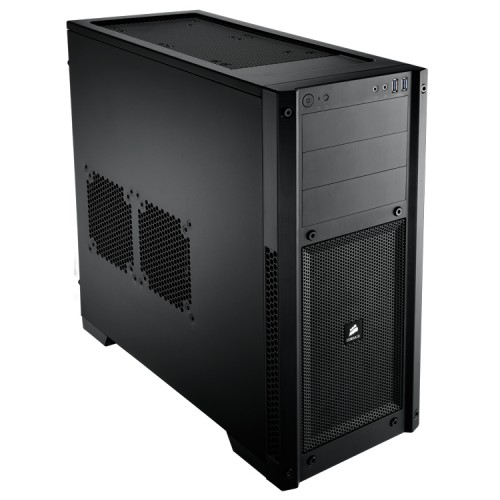
Case
The Corsair Carbide 300R was one of the cases recommended in the CustoMac guide. After watching some videos reviewing the case, I decided to go with it. For now the 300R is fine, but I may try to find a smaller case that can fit all of the components in the future.
To power the computer, I went with the Corsair Professional Series 650W power supply. It has more power than I need, but there was little increase in cost to buy a power supply with the additional headroom. I may decide to put in a high-end discrete graphics card down the road, so it made sense to go with a slightly higher end power supply.
Monitors
I already have two Dell 2001FP 20” monitors that I have been using on the existing Mac Mini desktop. I was able to get the monitors setup in a dual-display configuration by plugging them into any combination of the HDMI, DVI, or Thunderbolt ports. The only issue I noticed is that the system only allows a monitor in one of the two Thunderbolt ports. This is a limitation of the OSX driver configuration, but it isn’t one that will ever affect me.
System Installation
After I assembled the machine, I got ready to install OSX on the new hardware. tonymacx86.com has a handy installation guide which leverages two programs:
- Unibeast sets up a bootable USB drive that will let you install OSX onto your new system
- Multibeast is run after the machine has booted up to install any drivers needed as well as tweak any settings to get all of the system components to work
Using Unibeast is quite simple. You will need to purchase and download the OSX installer from the Apple App Store on a functioning OSX system. I used the Mountain Lion installer that I initially purchased to use on my Macbook Air laptop. Once you have properly formatted an 8GB USB drive, Unibeast will then copy the installer to the drive and add the additional drivers and settings necessary to bootstrap your system.
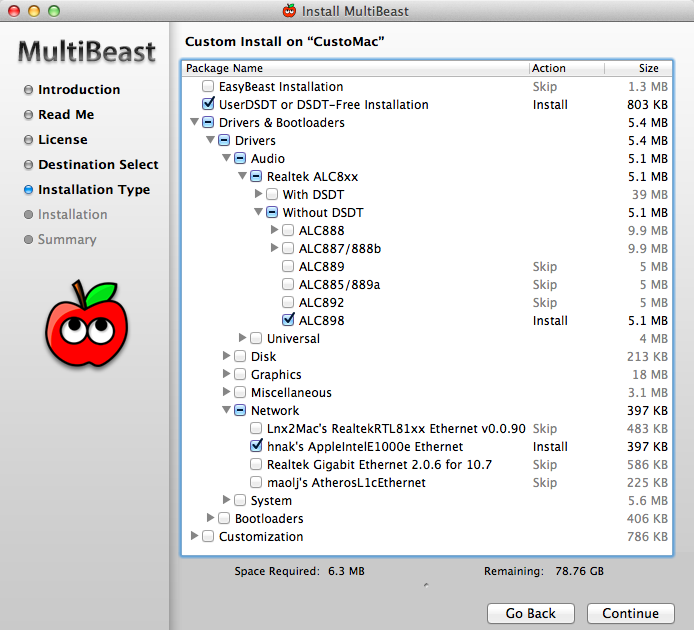
Multibeast is a bit trickier as you need to know what drivers you system components require. Since I went with a motherboard that is highly compliant with OSX, there was very little to add. I only needed to install an ethernet driver and an audio driver. The configuration used for my system can be seen here:
Conclusions
By carefully choosing your hardware and using the unibeast/multibeast utilities, it is very easy for anyone with basic PC building skills to setup a powerful OSX system for much less that a comparable Apple computer.
I would recommend keeping your USB drive around in case you need to do a system recovery, but otherwise you shouldn’t have any problems once setup.
The only time you will need to tread lightly is when you want to take an OS update. Usually these don’t cause problems, but I would recommend holding off until you have a chance to see if anyone else has any issues with the update.
If you prefer to just try out new OS updates, I would suggest cloning your boot drive so you can easily recover if you do run into an issue. In my setup this is very easy since I can just create a backup boot partition on my data drive.